|
|
i |
|
|
|
i |
|
Installation Tip ~ Graphic Roll Creases |
|
i
|
|
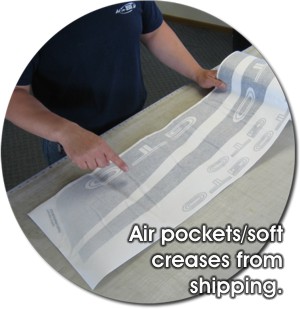
Graphic kits and large decals are generally shipped in a tube. While great care is taken in the handling of product prior to shipping, air pockets or soft creases may be apparent when items are unrolled upon receipt. |
|
i |
|
Reasons for this occurrence include climate changes, expansion or contraction and carrier handling. Moreover, backing papers with a waxy, slick surface have a lower surface energy than that of outer application tapes, Thus, the graphic and application tape tend to pull away from the waxy surface when relaxed, thereby creating soft folds/puckers. |
|
i |
|
Generally speaking, air pockets or soft creases as shown in the image below do not affect the final appearance of installed graphics, especially when stretched into place and applied as directed. |
|
i |
|
However, to ensure a trouble-free graphic installation, we recommend following the procedures below. |
|
i |
|
|
Once the graphics are received, we suggest rolling them out on a dry flat surface out of the wind and other weather elements.
If air pockets or soft creases are evident, simply follow the steps below. |
|
|
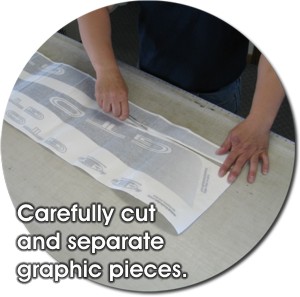
Carefully cut and separate the graphic pieces from the kit. |
 |
|
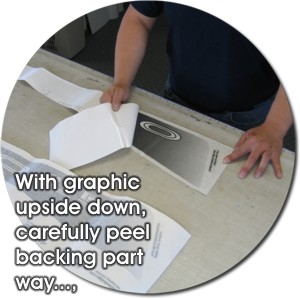
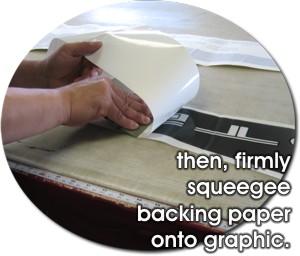
With the graphic face to the flat surface, carefully peel the backing paper half-way as shown.
Take care to keep the adhesive side free from dust. |
 |
|
Firmly squeegee the backing sheet back onto the graphic.
This will assist in removing the air pockets/creases and should flatten the graphic panel.
Repeat this process with the other half of the graphic piece as well as with all other parts of the kit. |
 |
|
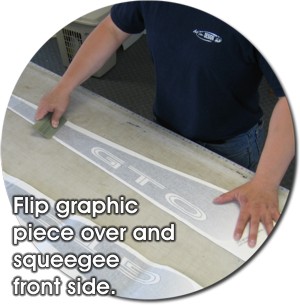
Flip the graphic piece over and squeegee the front side. |
 |
|
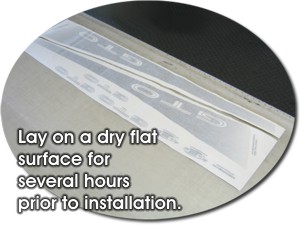
Lastly, lay graphic pieces on a dry flat surface for several hours prior to installation. |
 |
|
|
i |
|
i |
|
i |
|
i |
|
i |
|
Got more questions? Reach Out to our product team - we'll be happy to assist. |